

Windows 10 is expired in October 2025, as Windows 11 is only option to install or upgrade to for continuity of security and other updates.
Microsoft has announced about discontinuity of Windows 10 updates, as they instruct their users to upgrade to current version, or pay for updates if you still want to use the older version.
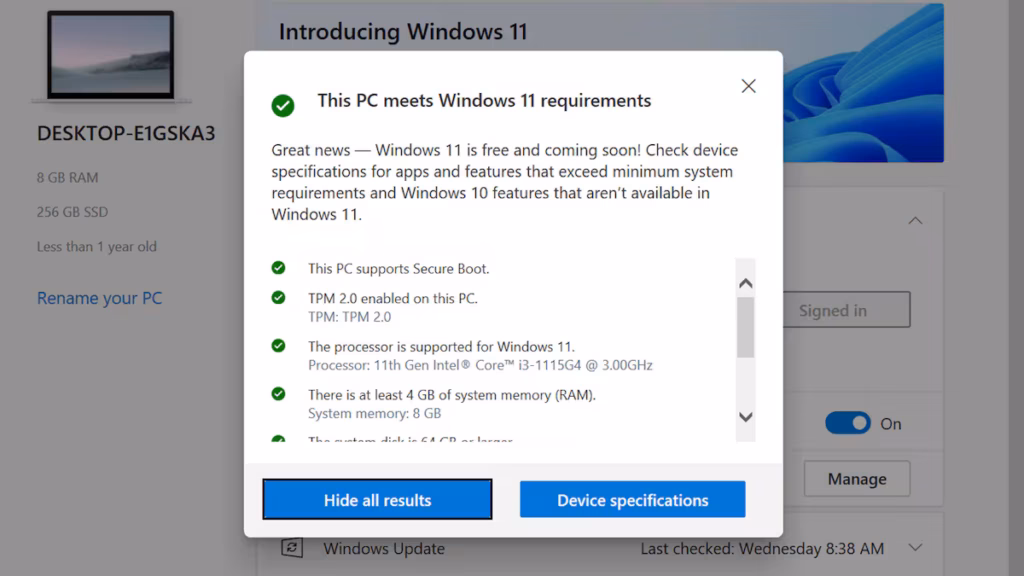
Minimum system requirements for install Windows 11:
- CPU: 8th gen of 1 GHZ or faster
- RAM: 4 GB o Storage: 64 GB or more
- Firmware: UEFI Secure Boot possible
- TPM: Trusted Platform Module (TPM) version 2.0
- Graphics: Support for DirectX 12 or later versions with WDDM 2.0 driver
Due to above requirements, old devices with less than 8th generation aren’t ready for Windows 11, but this doesn’t mean that the new version is not running in these machines.
You have to use rufus software to bypass above requirements, I have tested many old devices after bypassing it and are working fine.
1. How to upgrade Windows 10 or 8 to 11
Before installing Windows 11, we recommend that you save all your work and make a backup of your PC.
Your files will not be lost during the upgrade using the Windows 11 installation wizard.
Step 1: Open the .exe file by double-clicking on it.
Step 2: If you get this screen, you should download the PC Health Check app by clicking on the link.

Step 3: Accept the Licence Agreement and click on Install. Then click on Finish.

Step 4: Click on ‘Check now’.

If your computer doesn’t meet the requirements for Windows 11, you can’t upgrade your computer just yet.
Step 5: Go back to the Installation Assistant and click on ‘Accept and install’ to start the download and installation.

Step 6: The installation will start. This may take several hours, depending on the speed of your computer.
When the installation is complete, your computer will reboot, and Windows 11 will be installed.
2. Installing Windows 11 using the installation medium
Step 1: Connect your USB stick on which you want to install Windows 11.
Step 2: Reboot your PC and start Windows from the boot device (USB stick) you created. To choose your boot device, you will need to press a key when your PC (re)boots.
At the bottom, you may see ‘Boot menu’ with the key you need to press next to it. If ‘Boot menu’ is not an option, you will have to go to your BIOS or UEFI settings, or change the boot order there. (Possible keys to enter these menus are F2, F12, Delete or Esc).
Step 3: Once you have succeeded in booting Windows from your installation medium, choose the language, time zone and keyboard settings. Then click on Next.

Step 4: Click on ‘Install now’.

Step 5: Click I don’t have a product key, then click next

If you want to use an Academic Software licence, you should choose ‘Windows 11 Pro Education’.

Step 6: Accept the Licence Agreement and click on Next.

Step 7: Here you have two options:
- Upgrade: Install Windows and keep files, settings and applications Choose this option if you want to upgrade Windows. All files will be retained. This option is only available if a Windows version is already running on your computer.
- Custom: Install Windows only (Advanced) This option will reinstall Windows. All files on the computer will be deleted.

Step 8: Windows will then be installed. This may take a while depending on the speed of your computer.

First start-up of Windows 11 after installation
After Windows has been installed, your computer will reboot. Then go through the boot procedure to start using Windows.
Step 1: Select your region and click on Yes.
Step 2: Select the desired keyboard layout and click on Yes. Add a second keyboard layout if required.
Step 3: Name your computer and click on Next. Click on ‘Skip for now‘ if you want to do this later. Your computer will then restart.
Step 4: Choose how you want to set up your device and click on Next.
Set up for personal use: Sign in with your personal email account and have full control of your device.
Set up for work or school: Choose this option if you want to add your device to a school or work account. This can be useful to access your organisation’s applications or tools.
Step 5: Sign in with your Microsoft account and click Next. If you don’t have one yet, you can always create a new account by clicking ‘Create one!’.
Step 6: Click on ‘Create PIN‘ and create a new PIN. You will always be able to log in with this PIN code, so choose one that is easy for you to remember.
Step 7: If you have synchronised your files with your Microsoft account via OneDrive, you can restore them so that they are immediately accessible on the new installation of Windows. Choose ‘Restore from … (backup name)‘. Otherwise, choose ‘Set up as new device‘.
Step 8: Click on Next.
Step 9: Choose ‘Back up my files with OneDrive‘ if you want to synchronise your files with OneDrive to have your files available in case something goes wrong with your computer for example. Choose ‘Don’t back up my files‘ if you want to disable this option. You can still set this option after installation.